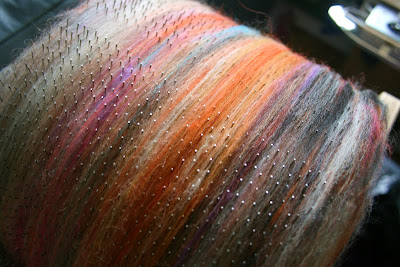
Showing posts with label fiber. Show all posts

Monday, 11 January 2016

Make It Monday: Needle Felt A Mini Unicorn!

Have you ever wanted a tiny unicorn? Needle felt one for yourself! 
Needle Felted Unicorn
Last week my lovely friend Yvette from 1000Crows.com came over to my house (This was not an unusual occurrence- we regally meet up to craft together in the evenings and chat about life over a far too sugary hot chocolate in a handmade mug) and she brought with her a tinie tiny little unicorn, made out of felt!
She had made it with some fibers as part of a felting kit that I gave her for Christmas, and had merrily stabbed away over the festive period to create the furball of joy that you see above. I begged her to take some pictures for me to write a tutorial for you all -  enjoy!
Felting Kit

What you will need: 

* Spin City Felting Kit (availible from spincityshop.com) , or stashed merino and wool fibres. 
* A standard felting needle
* A felting mat ( or thick piece of foam) 
* Small scissors 
* Love in your heart - you can't create tinie tiny Unicorns with an angry soul. It's just not possible. 

Ready, Steady, Go!

1. Select your colours. My unicorn was made with classic white for the body and hot pink for the tail, horn and mane, with a little black for the eyes. Why not go crazy and make yourself a rainbow'corn? She could look truly beautiful in stripes or spots.
 2. Start stabbing! Using your mat and needle, gentle smoosh and sculpt the basic shape. The more you stab, the easier it will be to define the contours. The body of my Unicorn is about 7cm long. Aim for a rough "n" shape (legs and back) with a little nobble on the side (neck).

3. Create the head. Take a smaller puff of fibre and stab at it until you form a small, oval ball. Add a little more fluff to create nubs for ears. 


4.  Define the two body parts. Continue to shape and stab, adding little bits of fiber to accentuate the different areas of your Unicorn. Use scissors to cut away parts that need more definition, such as between the legs and around the ears, until you have a shape that you like. 

5. Join together the head and body, buy placing the head ontop of the neck nub and stabbing your needle around and into the two shapes. You can choose how your 'corn will look by placing the head at different angles. Mine is fairly proud with her head angled upwards in a sort of "I'm watching the stars" pose.
6.  Now make your horn! First, rub together a length of fibre into a small tube, then stab away at it until you have the classic tapered shape. My unicorn's horn is as tall as her body. Join it onto the head with stabbing motions on and around the horn. 

7. Add some long, unicorn hair. My Unicorn has the same colour mane and horn - but you could mix things up a little bit. This might be a golden opportunity to use up some hand dyed wool locks or some shorter lengths of hand spun yarn. The hair was created buy pulling off a little bit of fibre and gently laying it in a sweet, slightly curved style around the head, ears and neck on one side only. 

8. Add some detail! Needle felt in a pretty swirl on your Unicorn's horn. This really brings her to life! Don't forget to add little black dots for eyes and a mouth. 

9. Et voila! You have just made yourself a tiny unicorn. Now, giver her to a friend to lighten up the dark days of January, or thread her onto a necklace or into some hand spun yarn for an instant good luck charm.  Why not keep her in your coat pocket as a secret magical pet to take with you on walks or on your commute? I keep mine with me on my desk or posed around my house - she makes me smile every time I see her, especially because she was made for me by my lovely friend Yvette. 
Pretty needle felted Unicorn
I Heart Unicorns
So there you go- how to make a little Unicorn in nine simple steps. If you make one, I'd love to see! tag me on @SpinCityUK on instagram or twitter. I'd like to say THANKYOU to Yvette for making me this Unicorn and for sending me over these pictures so that I could make a tutorial for you all.
If you would like to check out Yvette's blog, here is the link! Yvette is a vintage and antiques treasure hunter and photographer - she has impeccable taste and I always oooh over the things she finds. See her collection of curiosities in her shop! 

I hope you all have a busy, happy and craft filled January. 
Louise x

Wednesday, 25 February 2015

Unravel Knitting Festival 2015

Several times a year, I pack up my Spin City studio and head out in a big van to set up shop at knitting festivals around the UK, and last weekend I visited Unravel in Farnham for the first time!


Farnham is about a two- three hour drive away from me in Suffolk, which is one of the closest shows that I attend - usually my Mum and I (Karen) have the long haul up to Yorkshire or Wales, so I was excited to meet some of my more southernly customers in person!

It is a lovely little festival, with a great mix of exhibitors, spread over several floors in interesting, old rooms that used to be a Maltings factory in the Victorian era. The show organisers welcomed us warmly and made us both feel at home. After a quick cuppa it was straight down to work setting up our stall ready for opening the next day!

My stall at Unravel!
We were housed in the Tindle Studio with other sellers such as Sincerely Louise, Plant Dyed Wool, Belinda Harris-Reed and Easy Knits, so as you can imagine we were really busy all day!

I took my drop spindles, fiber batts, hand dyed rovings, blended rovings and hand spun yarns with me, as well as my trusty vintage dresser! It always makes my stand feel more like home- I used to have it as furniture in my kitchen!

Teaching drop spinning
 Mum and I taught spindle spinning to anyone who was interested in learning, and it always makes me feel happy to know that I could have helped start a new passion in someone!

This was my best show ever - I pretty much sold out of spindles and certain colourways by the middle of Sunday! Thank you to everyone who came and found my stall - it's so nice to meet you in person. On that note- did you all notice Bruce the cat walking around?! He came and visted me most days, and here we are having a little cuddle after the crowds left on Saturday night. Bruce lives across the road and comes to work with his mum who works as the receptionist at the Maltings!
Bruce the cat!

I also met up with Sarah from Crafts From the Cwtch, Wink from A Creative Being, Joanne from Not So Granny, and Corrie from Plutionium Muffins for a good old Pizza and chinwag on Saturday night which was just lovely. We laughed and schemed and shared projects and ate lots of Pizza, and I came away feeling like I had made great new friends.

Sunday, 28 April 2013

An Enchanted Forest

I've been creating some natural batts recently, using fibre from local farms. The first one I've created uses hand dyed Whitefaced Woodland- a really lovely breed of sheep that had a soft fibre with a springy texture, combined with naturally coffee brown Alpaca- from the same farm- so they should go well together!
I mixed the two up with hand dyed emerald green firestar and a sprinkle of Angelina just for fun, and here you have it, a magical, mystical batt fit for an elfin queen.


Saturday, 6 April 2013

Hand Pulled Roving and Green fingers

Today I have been making hand pulled roving for the first time! I am extremely excited about it and I love the first lot that I have made. It involves pulling batts through a diz- a phrase I find really hilarious! The spinning world has so many funny words.
Anyway- back to the rovings! I made two different colour ways today, a super glittery one in lovely royal colours and another in soft dreamy fairytale colours.
I've also been getting my fingers green in the garden, sowing seeds and digging about while my two little kitties run around like mad things with the first of the spring sunshine. All in all its been a lovely day so far.


Sunday, 4 March 2012

Batts, Cats and erm, CD Drop Spindles

Thought I would share a few things I've been up to recently with you all. I've decided to really try and make a go of my Spin City shop to help fund my degree course in fashion knitwear at St Martins. I've been trying hard for a few weeks now and I am getting such a lovely response for everyone- so thank you for taking the time to read my blog and support my little shop!


So- I am usually flitting like a little spring wren from London- where I study my MA course, to Suffolk- where most of my equipment lives, such as my drum carder, fleeces and traditional wheel. Not to mention a very supportive family who tolerates my boxes of fluff everywhere! I went back last weekend and made up a few batts and handspun yarns to put in my shop. The other picture is of my very naughty Siamese cat Gizmo- who loves to sit in anything you might be looking at!

But I just wanted to help….

Then the other day, I was inspired whilst in London and marooned from my spinning stash to make a drop spindle! I made a very rudimentary one out of a cd, a plastic chopstick, some cello tape, white tack and a curtain hook thingy. You will be surprised to know that it spun just fine and I managed to get a good few yards out of it! I am planning on making some proper drop spindles with a Spin City twist to add to my shop soon- so watch this space!

Resourceful or a little too addicted to spinning wool?! 

Hand Dyed Superwash Merino and Wensleydale Locks

Here are the updated pictures of the hand dyed yarn I was painting last night- I also made some more of my Wensleydale curls in a similar colourway while I had the dye pots out!


I think I still need to redye one of the hanks as it is slightly lighter in colour. I quite like though!

Friday, 20 November 2009

Spinning, knitting, designing.. busy busy busy!

I've been super busy this week. I'm preparing for an exhibition next month so i've been finalising swatch ideas....


I'm playing with floral motifs and experimented with a bit of dip dying- I just love the effect the big patterned swatch has come out with! I don't think I will use this idea for my current project though- but Its getting me all excited about what I can turn it into for Christmas presents!

I really like the contrast between the smaller motifs and the big chunkier knit.... those little flowers would make such a cute edging!
Even though I'm supposed to be working diligently on my exhibition project, my mind keeps wondering onto all things spinable. Spinning is just so addictive- I love the feel of fibre running through my hands and the soapy sheepy smell.... ahhh... I've been blending colours....
I like to call it ' beach comber'.... I made a scarf out of this colourway about two weeks ago and I have finally decided to just bite the bullet and knit a jumper out of it as I couldnt stop starring at all the pretty colours....
Here it is on my gorgeous Louet drum carder!!!! I love him so much! I bought him with all my 21st birthday donnations... (thank yooooouuuu!)
Here it is on my Ashford Niddy Noddy- totally useful to the handspinner! my better than using picture frames!...
And here is the finished yarn!!! I'll upload some pictures soon of my knit in progress... as it stands, i've managed to complete the back in just a few hours! I'm knitting it up on giant knitting needles- the whole back piece is litterally 30 stithes and 30 rows!!!

Wednesday, 18 November 2009

Mermaid


'WHO would be
A mermaid fair,
Singing alone,
Combing her hair
Under the sea,
In a golden curl
With a comb of pearl,
On a throne?'

Alfred Lord Tennyson 1830

I made this Batt yesterday! I want to keep it for myself!!!! I made it on my louet drum carder.... its in my shop :-)